So you want to build a home recording studio? It isn’t just a set of walls packed with gear—it’s gonna be the place you spend most of your life from now on ha ha! So get it right and enjoy! It’s where your raw, unpolished ideas could be turned into classic songs, or innovative sound design, whatever you’re into. 🤘
Life Changer!
Having your own studio at home is gonna change your life. Whether you’re into making your own music or working in audio, it will give you your own space to make as much noise as you like, whenever you want. It’s a personal space where you can dive into your projects whenever inspiration hits, without worrying about needing someone else to help. The comfort of being in your own space is a plus. You can set things up however you like.
Table of Contents
How to Build a Home Recording Studio
When setting up their studios, people often leap before they look, and this can lead to some common stuff ups. One of the most common mistakes is underestimating the importance of room acoustics. So before you start shopping for equipment and plug ins, you’ll need to work on the less glamorous but equally important things like cables, stands, and acoustic panels. Don’t think buying high-end gear will guarantee professional sound. Even the best equipment can’t compensate for poor room acoustics. You can’t turn shit into strawberry jam! 💩
Acoustics
When the acoustics are balanced, what you hear from your monitors is a true representation of the sound. This allows you to make informed decisions when mixing and mastering. You know your adjustments will sound good on other speakers or devices. Having a studio acoustically treated correctly is like playing a guitar that’s in tune.
A correctly treated space also allows for better recordings. Microphones pick up not just the direct sound but also the sound reflecting off surfaces. In an untreated room, these reflections can cause phase issues and muddy the recording. With proper treatment, you capture the source more cleanly, leading to higher quality raw tracks that are easier to mix.
>>> Click Here to Find a Microphone That Works for your Space <<<
More than anything, a well-treated studio can boost your creativity and productivity. When you’re not fighting against the room’s acoustics, you can focus on the creative. You’re less likely to experience ear fatigue, plus when you’re confident in your studio’s sound, you can work faster, knowing that there won’t be any nasty surprises later.
Sound proofing might also help with the neighbours. You’ll be able to crank it up! 🎸
Look Before You Leap!
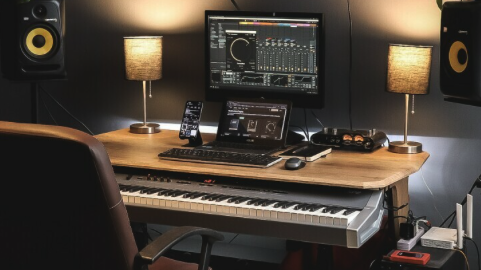
Before you start laying down the first cable or soundproofing a single wall, think about first the space itself. You need a space where sound is crisp, clear, and true, a room with the least natural reverb or one that’s far enough from teenagers shouting at each other over comms on Playstation. Once you’ve picked the best room, move around listening to what it sounds like naturally. Every space has its unique sound profile, influenced by its dimensions, shape, how it’s built etc. Hard surfaces like windows reflect sound, causing echoes and reverb, while softer materials like curtains absorb sound. The goal is a sound thats not too dead, not too reflective.
Add absorption panels where needed: These panels are designed to absorb a wide range of frequencies and are typically placed at first reflection points—locations where sound bounces off the walls to reach your ears. A good way to identifying these points is using the mirror trick, where you slide a mirror along the wall and mark where you see the studio monitors reflected. Kinda like those signs on trucks – if you can’t see my mirrors I can’t see you!
Bass traps are next: Low frequencies tend to build up in corners, making bass traps necessary to control the yucky muddy frequencies. They help to even out the bass response in a room.
Diffusers: These are used to treat the sound in a room by scattering the reflections, which can create a more natural-sound. They stop the room from sounding dead, which can be just as bad as having too much echo. Diffusers can preserve the room’s liveliness without compromising clarity.
Ceiling clouds: Whack some absorptive panels up, suspended from the ceiling—are also a common treatment, especially in rooms with high ceilings, to control vertical reflections. In addition to these treatments, it’s important to consider isolation. Sealing gaps around doors and windows can prevent sound leakage, which is crucial for recording.
Don’t Over Do it!
All that said, over-treating a room is also a mistake. It’s easy to get carried away with acoustic foam and bass traps, but too much absorption can deaden a room too much, sucking the life out of your recordings and making the space feel claustrophobic. The key is balance. You want to maintain some natural room ambience while controlling reflections and resonances.
Once it’s all done, another common mistake is putting speakers and workstations in the wrong spot. Getting this wrong can result in a skewed stereo image and frequency response, making mixing a nightmare. You have to think about where you put your gear. Placing the desk and monitors too close to walls, especially in untreated rooms, can cause bass frequencies to amplify and muddy the sound. Monitor placement and the listening position should form an equilateral triangle so you get a great stereo sound.

What’s the Buzz?
Now, the really nerdy part. Ignoring the electrical setup in a home studio can lead to loads of problems later. Electrical hums and buzzes are not just minor; they can ruin your recordings. These noises usually mean you have electrical issues, such as ground loops, which occur when there are multiple grounding points at different potentials. This can be a common issue in home studios where the equipment is plugged into different outlets.
To make sure you have a clean power supply, get a dedicated power circuit for your studio equipment. This can help stop interference from other electronic devices in your house that could be sharing the same circuit. Surge protectors are also important to make sure nothing blows up and sets the house on fire! 🔥
Use quality cables so you have less noise. Low-quality cables can act as antennas, picking up electromagnetic interference from other stuff around the house. You should plan the layout of your studio to minimise electrical noise. Cables shouldn’t run parallel to power lines and balanced cables, like XLRs for audio are less noisy.

in a nut shell 🥜
So yep, a lot goes into setting up a home studio. It’s not just equipment; it requires real attention to acoustics and electrical setup to ensure the best recording environment. By thinking about all these elements, you create not only a space that captures and nurtures your creative flow but also a technically sound environment that faithfully records and reproduces the audio, allowing you to produce professional-quality work at home.