Wanna finally nail that perfect workflow and get your creativity and efficiency going? 🤔
The first and most basic thing to consider is music and SFX library organization. Whether you’re a pro sound designer looking for a new way to organise things, a music producer who wants things to come together fast, or an audio nerd just stepping into the world of audio, you might find your first step towards mastering the art of sound library organisation here.
Sometimes the biggest hurdle between you and that next quick idea is the ability to find and grab sounds or music from your library. It’s not just about having an all the sounds and beats in the world; it’s about being able to access them and throw them into a mix at speed.
Although seemingly boring compared to other topics we could be discussing in audio production, organising your library is essential to your workflow. You wanna spend every second in the edit or mix and not fluffing about on hard drives in a desperate search for sounds. 🔍
Table of Contents
SFX Library Organization: Getting Started
So let’s talk about the secrets of efficient file naming, the magic of metadata, and the tools that transform your sound library from a chaotic mess to a well-oiled machine that gets your producing in record time. Imagine having the ability to snap up the perfect sound effect, riff or beat with just a few keystrokes – fingers crossed this guide makes it a reality.

Finding a Needle in a Haystack
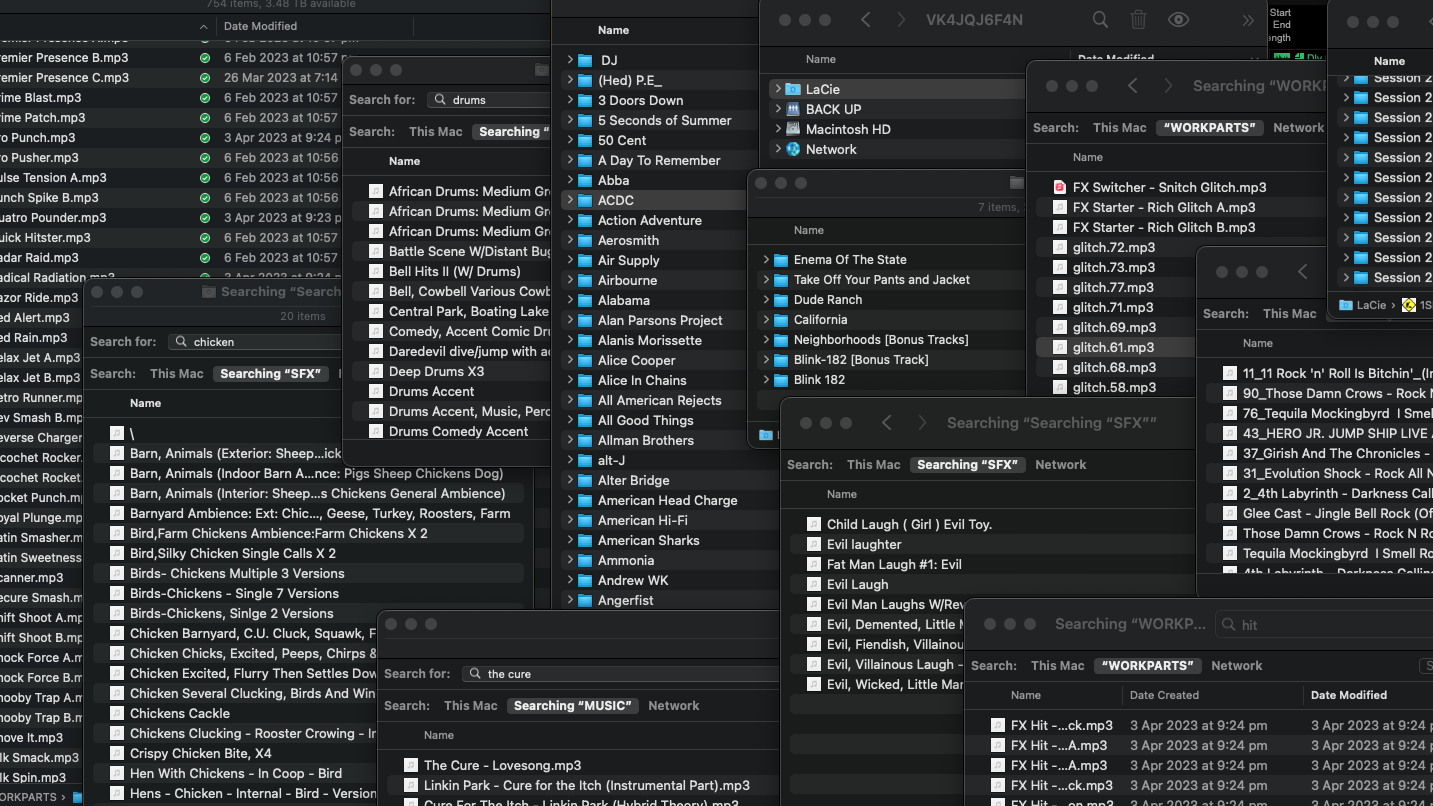
Let’s start in the most basic and obvious place for managing your sounds – file naming.
Whenever you name a file make sure it’s something you will remember to search in the future. So don’t use random words you think are creative at the time. Think about ‘6 months in the future you’ and how they will find this sound later. 👏👏👏
A well-thought-out file naming convention is the first stop on the train to ‘efficiencyville’ – new town I just invented. you wanna have a system that is both descriptive and concise, allowing you to pinpoint the exact sound you need with just a glance at its title. This could mean starting with a broad category and narrowing down to specifics, like ‘Short_Glitch_FX_guitars_and_beats’ or “Ambience_Rainforest_Daytime_Birds_Chirping’.
Make life easier for ‘6 months in the future you’
Next thing to think about is metadata. This is the ‘behind the scenes’ info hidden in your file. Metadata is important for searchability and categorisation. Just think if it as extra tags and words you can add to a file name, without it actually being in the file name. You can embed anything from BPM, to things like genre, or other random categories that work for you.
Al that said, what is the point of having a well organised file system if the audio quality is not up to scratch? That’s where a bit of regular quality control comes in. Sounds you loved a year ago might not be up to your current standards anymore, or yo might have found a better version of the initial sound. So I recommend a semi regular Spring clean of your library to get rid of sounds that aren’t useful anymore – or just archive them in case they sound good again in the future.

Sound Miners and Snappers
Now you have all your files named and things are easy to find quickly, the search begins for apps to help integrate your workflow whatever Digital Audio Workstations (DAWs) you’re using.
I’m on Pro Tools, but most of these apps will work the same with other DAWs like Logic Pro, Reaper, Ableton Live, and FL Studio etc. These software platforms give you a seamless bridge between folders and drives and your edit window, drastically speeding up the process.
Applications like Snapper by Audio Ease are a godsend for me. Snapper works by providing a quick preview of audio files directly from the Finder (on macOS), without the need to import them first into your DAW. It displays a waveform view and allows you to play and loop the sound, adjust its start and end points, and even convert it to your desired file format. Once you’ve found the perfect sound, you can simply drag it into your DAW’s timeline.
There are several alternatives to Snapper that also offer efficient ways to manage and integrate your sound library with your DAW:
Soundminer: A powerful tool that is almost an industry standard for sound designers. It provides advanced search functions, metadata management, and a robust database for large sound libraries. It also integrates with various DAWs, allowing for easy drag-and-drop of files.
BaseHead: This application is another popular choice. It offers powerful search capabilities, batch renaming, and the ability to spot sounds directly to the timeline, streamlining workflow.
AudioFinder: Designed for Mac users, this app is a comprehensive tool for managing, organizing, and processing your samples and sound effects. It includes features like metadata tagging, batch processing, and direct integration with digital audio workstations.
Resonic Pro: This is a sample manager and browser that is built around the idea of creative sample and preset browsing. It offers a waveform view, fast previewing, and the ability to drag and drop files into any DAW.
AdsR Sample Manager: A free tool that makes your entire sample library searchable and can play well with any DAW, offering tag-based searching, and the ability to preview audio files in sync with your project’s tempo.
All these apps are great for speeding up your workflow. Keep your creative flowing instead of constantly stopping down for ages while you scratch your head searching for the perfect sound.
The way these apps work is by indexing your sound library, reading the embedded metadata, and providing an interface where you can search for sounds based on various criteria without leaving your DAW. How good, right? Anyway, get one!

Save Save Save! Back Up Everything!
Man, your files are named so well… and you’re snapping those sound mined files straight into Pro Tools likes like a wizard. You’ve nailed the first step in getting working effectively by sorting out your library. Now what? Well, I reckon it’s just as important to back everything up. 💾
So many times over the years I have needed to go back to old sessions and files I thought I’d never need again. But their time in the sun always seems to come back. I’d suggest having a great archive of stuff is great just for the fact you have stuff to listen back to in years to come and either laugh or get inspiration and seem how far you’ve come.
Every now and then you’ll have a project that needs a specific sound effect or musical cue that you created years ago. Backing up your audio files is a forward-thinking move I highly recommend. It’s about creating a reliable system that ensures you can access any piece of work, at any time, without the need to recreate it. And yeah, I’ve stuffed up a few times and had to painfully recreate something from scratch knowing I’d made it years before and could have just dragged it out of an archive. Doh!
The future is unpredictable, and the sounds or music you create today may find their perfect place in a project years down the line. What seems like a one-off audio clip for a specific event could turn into a recurring request. By backing up your work, you’re not just saving files; you’re building a personal archive that will be a goldmine in in the future.
The process of backing up can be as simple as copying files to an external hard drive or as comprehensive as using cloud storage services that sync your data across multiple locations. The key is redundancy; your backups should exist in more than one place to protect against data loss from hardware failure, theft, or a natural disaster.
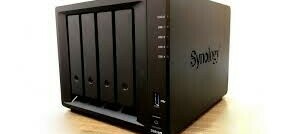
My backup of choice for archiving files is the Synology DS918+. It’s a NAS system (Network Attached Storage), so unlike an external hard drive that connects directly to the computer, it connects to Wi-Fi. Then any device on the network can access the stored data.
NAS systems have a large storage capacity and can be expanded with more or larger drives. They usually come with multiple hard drive bays, so you can increase storage space down the track.
Here’s a closer look at some alternatives, each with its own advantages and drawbacks:
QNAP NAS Units
Pro: Loads of features and lots of third-party applications – very versatile.
Con: A bit more complex to set up and manage, challenging if you’re not an IT nerd.
Cloud Storage Services
Pro: Easy to use and accessible from anywhere with an internet connection.
Con: Ongoing subscription costs can add up – full dependence on internet connectivity.
External Hard Drives with RAID
Pro: Directly attached storage often offers faster data transfer speeds and is simple to configure.
Con: Lacks the network capabilities of a NAS, limiting access to the device it’s connected to.
Each of these options will give you an excellent way to secure your audio for that rainy day, but the right choice will depend on what you need and how you like to work.
in a nutshell 🥜
Hope all that wasn’t too exhausting. A bit boring, yes… but’s it’s so important. If you don’t realise it now, trust me… you will down the track, so save yourself the nightmare. So let’s take a minute to recap the strategies. From file naming to metadata, and the handy apps to get audio into your DAW, we’ve covered the essentials to help you find sounds faster and give you workflow a giant kick in the pants.
But remember, a perfectly tuned library is an ongoing process. You’ve gotta give it some regular attention and fine-tuning. Think of it as your little sonic herb garden that needs watering everything now and then ha ha. But most importantly, make it work for YOU!
So get into it. Begin with the basics: audit your current library, work out a way of naming files that works, and grab a few tools that make sense for your creative process. Don’t let being unorganised ruin your creative spark. Let the ease of finding keep your brain in create mode.
As you get things going, come back here and share your experiences. I’d love to know what works for you? What challenges have you faced? Your insights could be the missing piece in someone else’s puzzle.
Ready to get started? Your future self—and your future projects—will thank you.
Let the organization begin! 🚀🎸💥


Hey,
This article is like a savior for anyone dealing with the madness of sound library chaos. The tips on file naming and metadata totally resonate with the times I’ve been on a wild sound hunt.
Those app recommendations for DAW integration sound like they’d make life so much easier. And, of course, backing up files – been burned by not doing that before. How do you go about keeping your sound world organized?
Thanks Jake. It’s been a lot of trial and error over the years using different external drives etc. I’ve eventually settling on having one 5 TB Lacie Rugged drive as my ‘work drive’. I use this for everything including sound effects library, music and work parts, as well as all my Pro Tools sessions. I find having everything on the one drive makes moving things around quicker during sessions. I don’t save anything on the internal Mac drive because I don’t want to slow it down. Then I just manage the work drive and get rid of things I’m not using actively. At the same time, everything is constantly being backed up to the Synology NAS. And then if I ever need something older, I can just drag it in off the back up. And, I love Snapper for previewing audio and then ‘snapping’ it into Pro Tools. But it’s mainly about doing some spring cleaning every now and then.