Ever needed to create the sound of a specific space and tried and failed to get it right using a reverb or delay? This is where convolution reverb comes in.
What is Convolution Reverb?
Convolution reverb is a type of audio effect that makes it sound like a recording was made in a different space, like your bedroom, a large hall, the interior of a car, or even a cardboard box.
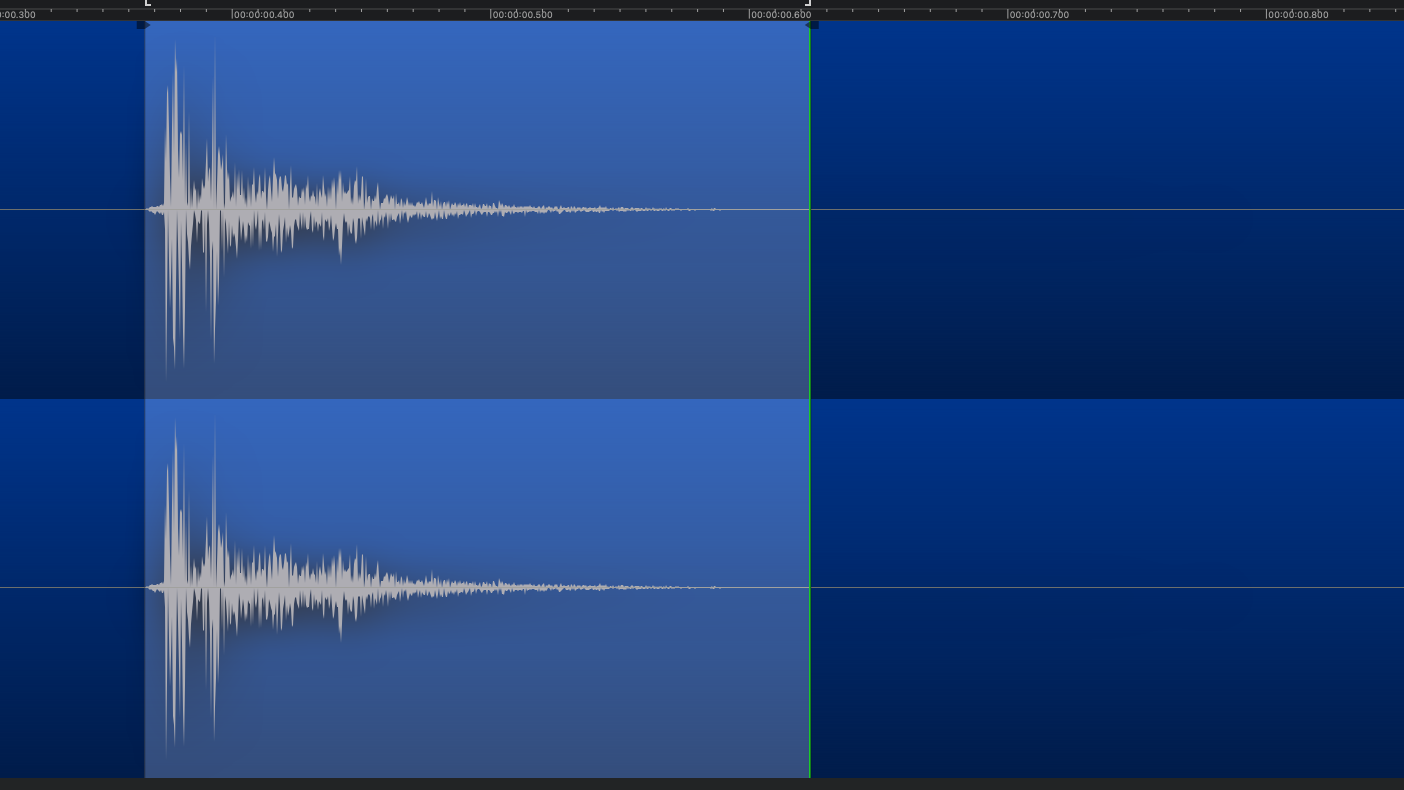
It works by using a special recording called an “impulse response“, which is basically a recording of the reverb of the space you are simulating.
When you combine this recording with your own audio, like a voice or sound effect, it makes your sound seem like it was recorded in that same place. It’s like digitally placing your sound in a new location, giving it the echo and atmosphere of that specific environment.
What makes convolution reverb great is its versatility and ability to capture the exact acoustic characteristics of any space, no matter how ordinary or bizarre.
This flexibility gives you loads of creative possibilities in audio production. You can transport sounds to virtually any environment, add realism to the audio and also take the storytelling to another level.
Convolution Reverb vs Standard Reverb
The main difference between convolution reverb and standard reverb is the way they simulate the reverberation of a space. Convolution reverb uses the impulse responses mentioned before, to mimic the natural echo of real-world spaces.
Using this method gives you a much more realistic sound, as it directly applies the actual acoustic characteristics of specific environments to the audio being processed.
Standard reverb (also known as algorithmic reverb) on the other hand, uses mathematical algorithms to create the reverb effect. It’s much more flexible and not as ‘set in stone’, because you have the ability to change parameters like room size, decay time, etc.
So you might not be able to exactly replicate a specific space like a convolution reverb can, but you can create a similar sound and then have more options for further adjustment.
>>> Learn How to Add Impact to Your Sound Design with Layering <<<
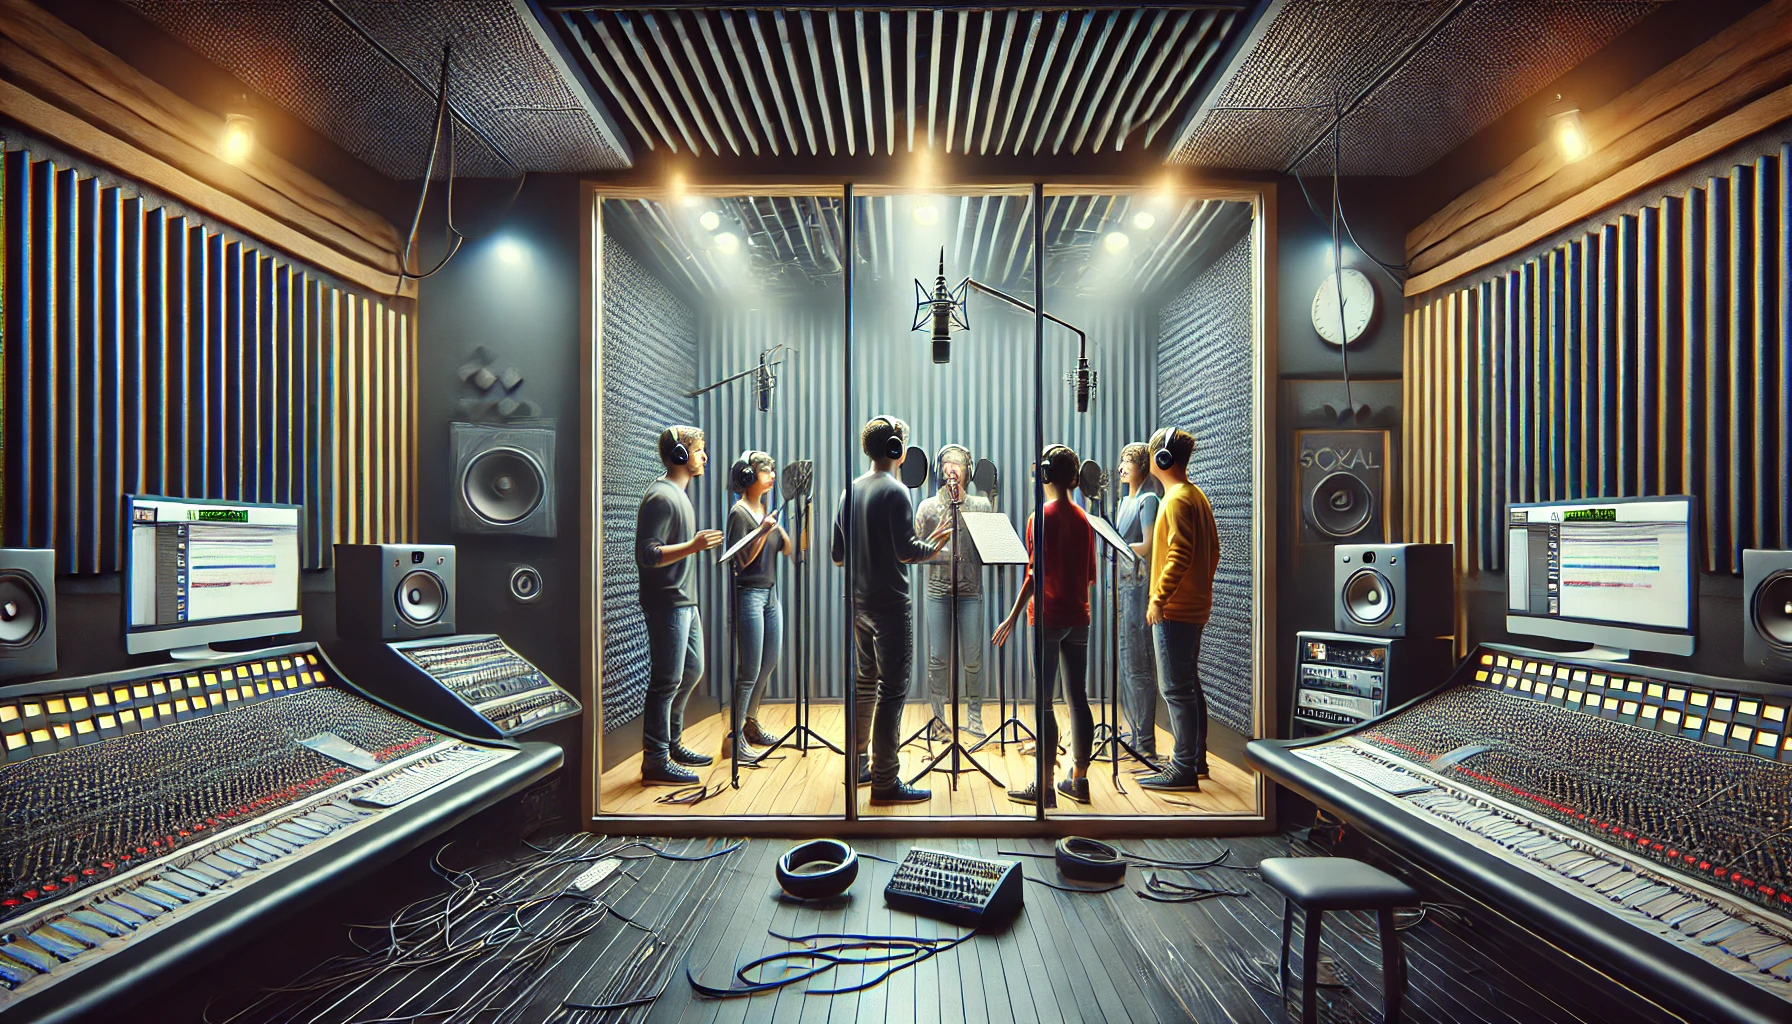
How to capture and Impulse Response
Capturing an impulse response is a simple process.
You just need a recording of the way sound reverberates in a whatever space you are trying to simulate. The easiest way to do this is to record yourself clapping. One short, sharp clap sound. A nice clean and clear recording will capture the room or space’s acoustics in one small audio file.
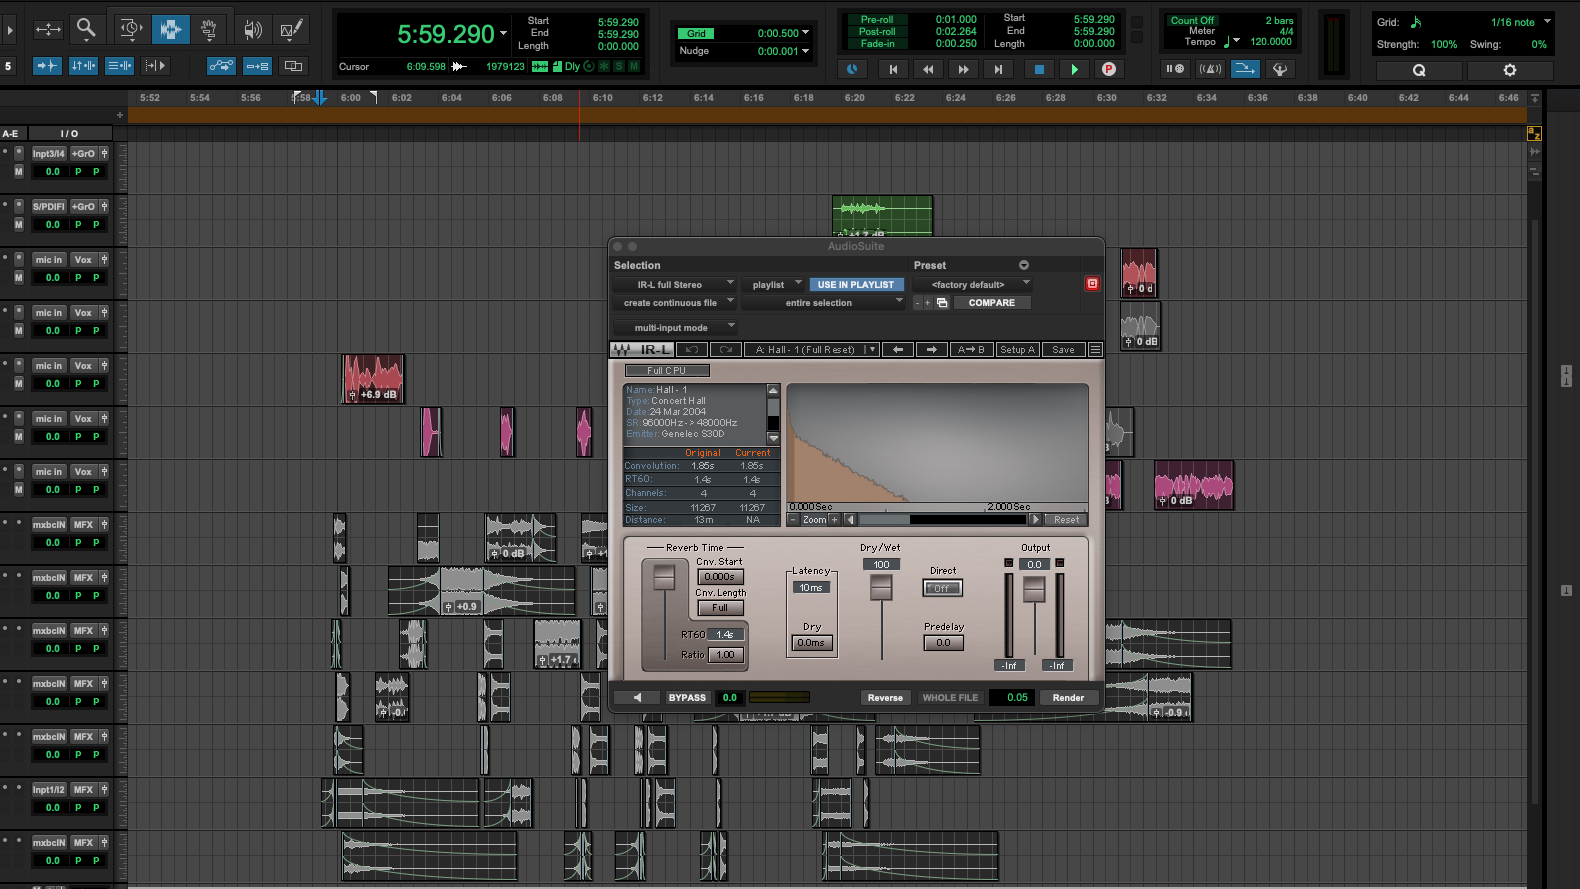
After you’ve recorded it, trim the audio file and normalise it so it’s a nice clean isolated sound. It can then be imported into a convolution reverb plugin and the acoustics of the space can be applied to whatever voice or sound effects you want.
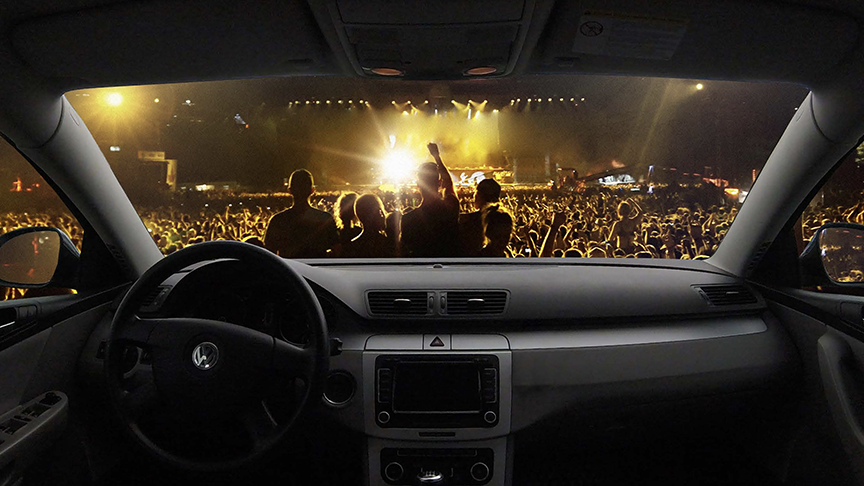
Why Not Use the Real Thing?
Let’s say you’re working on a project where you need to recreate the sound of the kitchen in your own your own house. Convolution reverb would be the best option.
The kitchen in your house has its unique acoustic signature. It’s not just about the general echo you might find in any kitchen, but the specific way sound interacts with your kitchen’s dimensions, walls, and even the placement of furniture and appliances. Convolution reverb allows you to capture the exact sound of your kitchen.
If you used a standard reverb, which relies on algorithms to simulate reverb effects, you’d be playing around with settings for hours and might get close but it will still be just an approximation of a kitchen’s acoustics.
Standard reverb wouldn’t be able to accurately reproduce the way sound moved around, because it doesn’t know you just moved the coffee machine and your fridge is now covered in magnets from the neighbourhood plumber.

Thinking Outside the Box
Convolution reverb is usually used for simulating real-world spaces, but there are a lot of creative, less conventional ways it can add some weirdness or creativity to your sound design. use it to create strange sound textures and effects.
By applying impulse responses from non-traditional sources, such as metallic objects, underground tunnels, or even the insides of instruments, you can add unusual and crazy reverberations. So with a bit of tinkering you could transform a sound into something entirely different.
Another creative use is for manipulating voices. Using impulse responses from spaces with distinct echo characteristics, or even from other objects like a seashell, the cardboard box or a metal container, will completely change a voice recording.
So you can make a voice sound like it’s from another planet, or just put it inside a race driver’s helmet.
The Downside of Convolution Reverb
Convolution reverb, while impressive for its realistic sound emulation, does have some downsides. It can sometimes be taxing on your CPU power, potentially causing more latency or slowing down other things running on the system.
The other downside is that unlike standard reverb, convolution reverb relies solely on the pre-recorded impulse response, which uses the characteristics of these specific recordings. Not usually a problem though, because that’s the whole point of using it.
You can adjust levels and sometimes apply basic filtering, but you can’t change the reverb’s properties. So if you recorded your impulse response in a cardboard box, you are limited to the sound of that specific box.
>>> Explore Other Trending Techniques in Sound Design <<<
in a Nutshell 🥜
So, why would you pick a convolution reverb over a standard reverb?
It all comes down to how keen you are to get a fully realistic sound. You could be working on a film where the scene it shot in a specific room or space and you need to add sounds. Convolution reverb is the perfect tool for creating the exact same acoustics on additional sound design.
But it’s not just about authenticity and a realistic sound.
Convolution reverb can bring a depth and richness to your audio that’s hard to replicate with standard reverb. The tiny differences in the echoes and reflections and the way the sound bounces around the area are very complex and detailed when using convolution reverb. It’s like comparing a high-res photo to a painting. They both look good, but they capture things on a different level.
It doesn’t mean convolution reverb is always a better choice. You’ve just gotta decide what’s right for the job each time. If you need precise control over every aspect of the reverb, standard reverb is the way to go.
But when you’re aiming to immerse your audience in a specific, realistic space, convolution reverb is awesome. It can really bring your mix to life and make your audio stand out.