What is normalization is it one of the key factors to getting high-quality sound.
But what the hell it it? Let’s slap on the production goggles and do a deep dive into the what, how and why. This will be great if you’re a beginner to intermediate audio engineer, with the technical stuff broken down into simple terms.
What is Normalization?
Normalization is the process of adjusting the gain of an audio signal so that its peak amplitude reaches a target level. This process helps to ensure that audio signals are consistently loud and clear across different playback systems.
Types of Normalization
There are two primary types of normalization: peak normalization and loudness normalization.
Peak Normalization
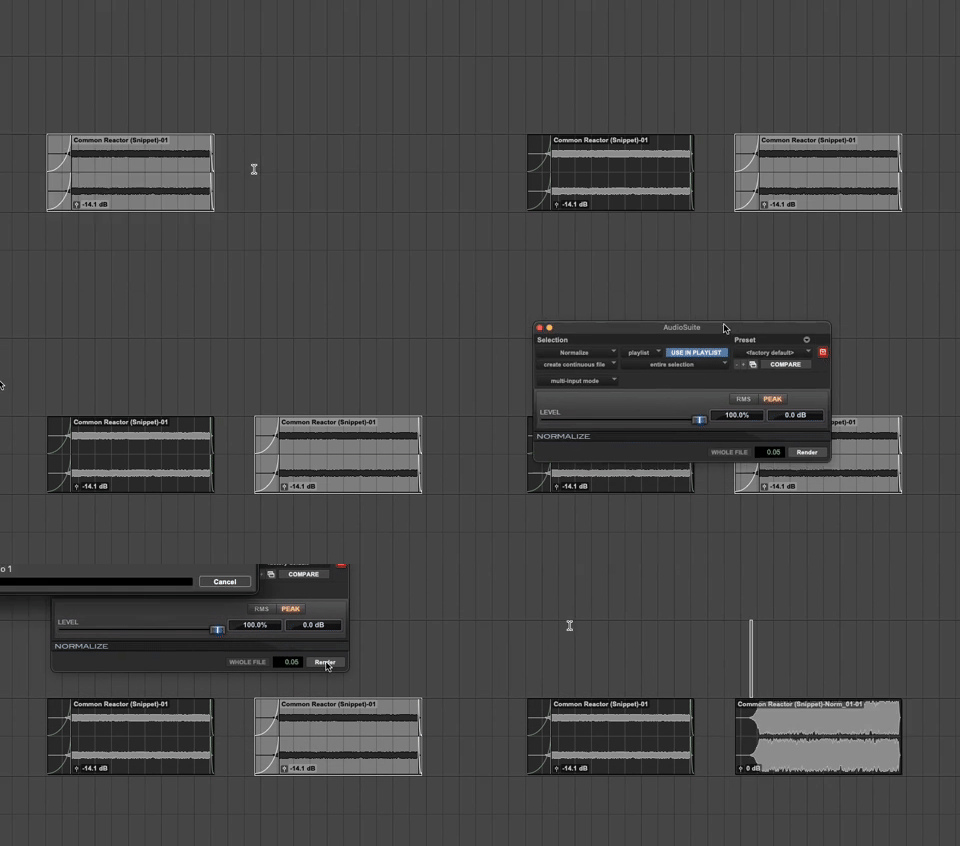
Peak normalization adjusts the audio gain so that the highest peak in the audio reaches a specified level, often just below 0 dBFS. Think of it like turning up the volume on your favourite Led Zeppelin track to just below the point where it starts to distort. And yeah I know, ‘but these go to eleven!’
Loudness Normalization
Loudness normalization, on the other hand, adjusts the overall gain to achieve a target loudness level, measured in LUFS (Loudness Units relative to Full Scale). It considers the perceived loudness rather than just peak levels, ensuring a more consistent listening experience across different tracks and media. It’s like making sure every song on your playlist hits you with the same punch as a Skrillex track.
>>> What Is A Multiband Compressor For? <<<
 Benefits of Normalization
Normalization offers several benefits:
Consistency: It ensures all tracks in an album or playlist play at a similar volume, avoiding the need to adjust the volume. Also a way of ensuring commercials on TV or radio are at the same level.
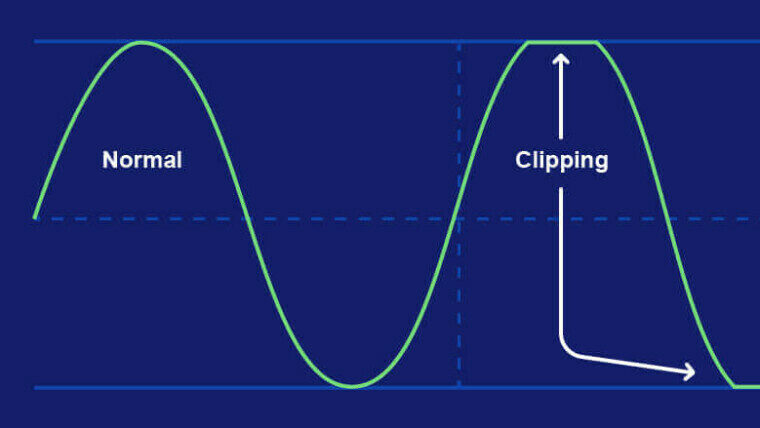
Clarity: By ensuring the signal is strong enough without introducing distortion or clipping, normalization enhances audio clarity.
Broadcast Standards: It helps meet industry standards for loudness, essential for broadcasting and streaming platforms to avoid penalties or listener fatigue.
How to Normalize Audio
Normalization can be done through different steps depending on the type:
Peak Normalization Steps
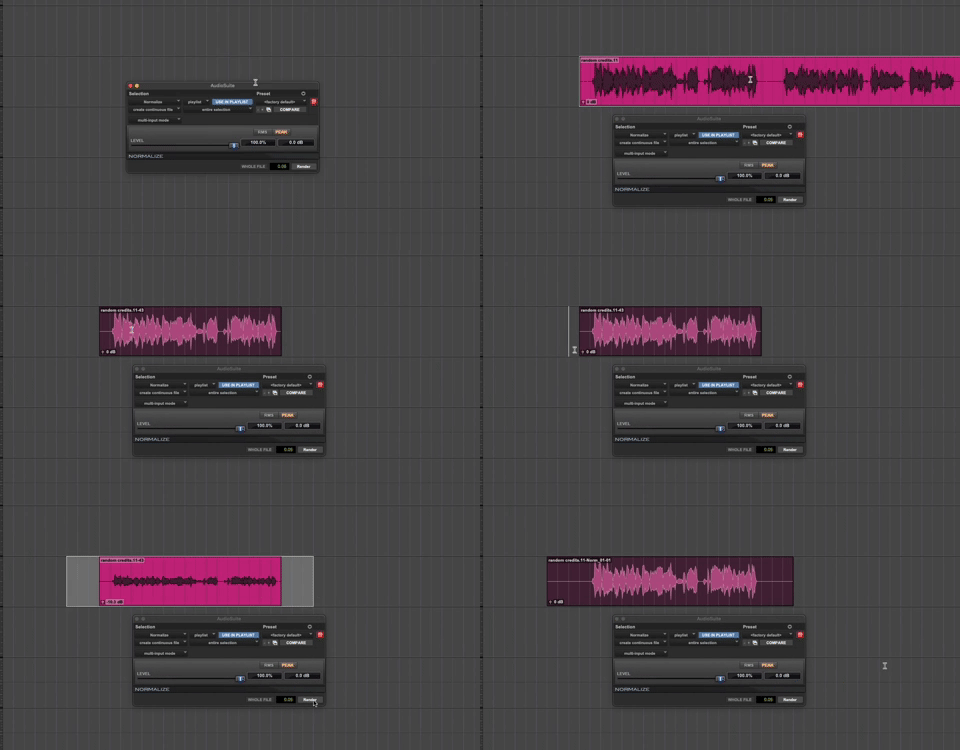
Analyze Peaks: Use a plug in like Avid’s Normalize to analyze the audio’s peak levels.
Set Target Peak Level: Decide on the target peak level (e.g., -1 dBFS).
Apply Gain Adjustment: Increase or decrease the gain so that the highest peak reaches the target level.
Loudness Normalization Steps
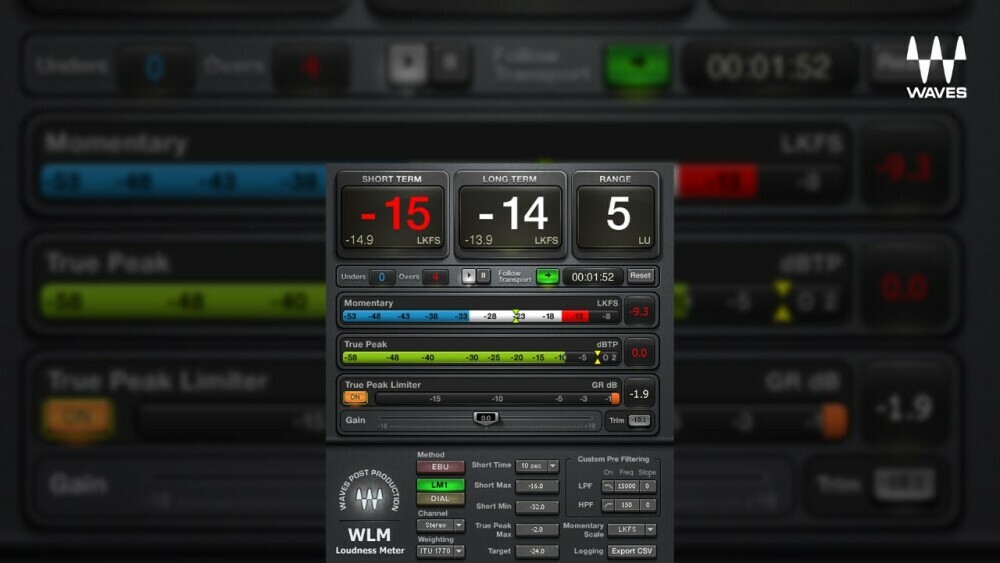
Measure Loudness: Use a loudness meter to measure the LUFS of the audio.
Set Target LUFS: Choose a target loudness level (e.g., -14 LUFS for streaming platforms).
Adjust Gain: Apply gain adjustment to achieve the target LUFS, ensuring the overall perceived loudness is consistent with the desired level.
>>> Parallel Compression: How What When Why <<<
 Tools for Normalization
Several tools and plugins can help with normalization, including:
DAWs: Most DAWs like Pro Tools, Logic Pro, and Ableton Live have built-in normalization tools.
Audio Editors: Tools like Audacity and Adobe Audition provide easy-to-use normalization functions.
Plugins: Specialized plugins like iZotope RX and Waves Loudness Meter offer advanced features for loudness measurement and normalization.
When to Use Normalization
Normalization should be used in audio production to enhance the consistency and quality of the audio.
Preparing Audio for Distribution
When preparing audio for distribution on platforms like Spotify, YouTube, or radio broadcasts, normalization ensures that your tracks meet the loudness standards of these platforms. This helps maintain a consistent volume level across different playback systems.
Creating Albums or Playlists
When compiling an album or playlist, normalization ensures that each track plays at a similar volume level. This avoids the need for listeners to adjust the volume between tracks, providing a seamless listening experience. Imagine putting together a mixtape where every track hits just right, from AC/DC to The Beatles. Same thing if you’re formatting a classic rock radio station!
Mixing and Mastering
During mixing and mastering, normalization can be used to ensure that individual tracks or stems have the right levels before further processing. The end result is a balanced mix without clipping.
>>> Tips For Achieving A Clean And Clear Mix <<<
 Podcast Production
In podcast production, normalization ensures that speech is clear and consistently loud, making it easier for listeners to hear and understand the content without having to adjust the volume frequently. Think of it as making sure every word in your true crime podcast hits as hard as a plot twist in “Serial.”
Video Production
For video production, especially in post-production, normalizing audio tracks ensures that dialogue, music, and sound effects are at appropriate and consistent levels, contributing to a professional-sounding final product.
Live Sound and Broadcasting
In live sound and broadcasting environments, normalization helps maintain a consistent volume level for different audio sources, ensuring a smooth and enjoyable listening experience for the audience.
Preparing Samples and Loops
When creating and preparing samples or loops for use in music production, normalization ensures that these elements have a consistent volume level, making them easier to integrate into projects without additional gain adjustments.
Reducing Clipping and Distortion
Normalization can help reduce clipping and distortion by ensuring that audio levels are within acceptable limits, especially when dealing with recorded material that has inconsistent levels.
>>> Review: Audio-Technica ATH-M50x  <<<
<<<
 When to Avoid Normalization
While normalization is beneficial, there are specific scenarios where it might not be the best choice:
Maintaining Natural Dynamics
If preserving the natural dynamics of a recording is crucial, normalization might not be the best choice. Normalization, especially loudness normalization, can sometimes compress the dynamic range, which may not be desirable for genres like classical music or jazz, where dynamic contrast is essential. Think of it like turning a symphony into a flatline—definitely not rock ‘n’ roll.
Already Mastered Tracks
Avoid normalizing tracks that have already been professionally mastered. Mastering engineers often fine-tune the levels to achieve the desired sound, and additional normalization can alter their work, potentially degrading the quality.
Clipping and Distortion
If the audio contains peaks that are already close to 0 dBFS, peak normalization could cause clipping and distortion. In those cases, it’s better to manually adjust levels or use compression.
Subtle Sound Design Elements
For sound design elements that rely on subtle volume changes or effects, normalization might flatten these nuances. For example, in ambient or experimental music, the quiet parts are as important as the loud ones, and normalization can disrupt this balance.
Multi-Track Projects
In multi-track projects, normalizing individual tracks can cause imbalances in the mix. It’s better to adjust levels within the mix rather than normalizing each track, which can lead to an unnatural sound.
Sound Effects with Intentional Variability
If you’re working with sound effects that intentionally vary in volume, such as a whisper followed by a shout, normalization can reduce the intended impact by leveling out the differences.
Broadcast Standards Compliance
For broadcast audio, it’s essential to comply with specific loudness standards (e.g., EBU R128, ATSC A/85). Over-normalizing to reach these standards without considering overall loudness compliance can lead to audio that is too quiet or too loud when broadcasted.
>>> Basic Equipment For Recording A Podcast <<<
 Using Normalization Within a Mix
Normalization within a mix on individual files can be beneficial for several reasons, though it should be done with careful consideration of the overall mix balance and dynamics.
Consistent Gain Staging
Normalization helps achieve consistent gain staging across individual tracks, which is crucial for maintaining headroom and preventing clipping. By normalizing individual tracks, you ensure that each element of your mix starts at a similar level, making it easier to balance them during the mix.
Easier Mixing
When tracks are at similar levels, it simplifies the mixing process. You can make more accurate adjustments to faders, EQ, and other effects, as you’re not constantly compensating for wildly varying input levels. This uniformity can make your workflow more efficient.
Identifying Problems
Normalization can help identify issues like noise or unwanted artifacts that might be masked by low levels. By bringing these elements to a standard level, you can more easily hear and address any problems before they become part of the final mix.
Improving Signal-to-Noise Ratio
Normalizing individual tracks can improve the signal-to-noise ratio, especially if some recordings were done at very low levels. By boosting these signals, you can ensure that they are above the noise floor, making it easier to process and clean up the audio.
Consistent Processing
Plugins and processing tools often work more effectively when input levels are consistent. Normalizing tracks can ensure that compressors, EQs, and other effects respond predictably, leading to more consistent and controlled processing results.
Preparing for Automation
Normalization can set a good starting point for automation. If all tracks are at a similar level, you can automate volume changes more effectively, knowing that you’re starting from a balanced baseline.
>>> How to Create Big Hard-Hitting Impact Sounds <<<
 Popular Plugins for Normalization
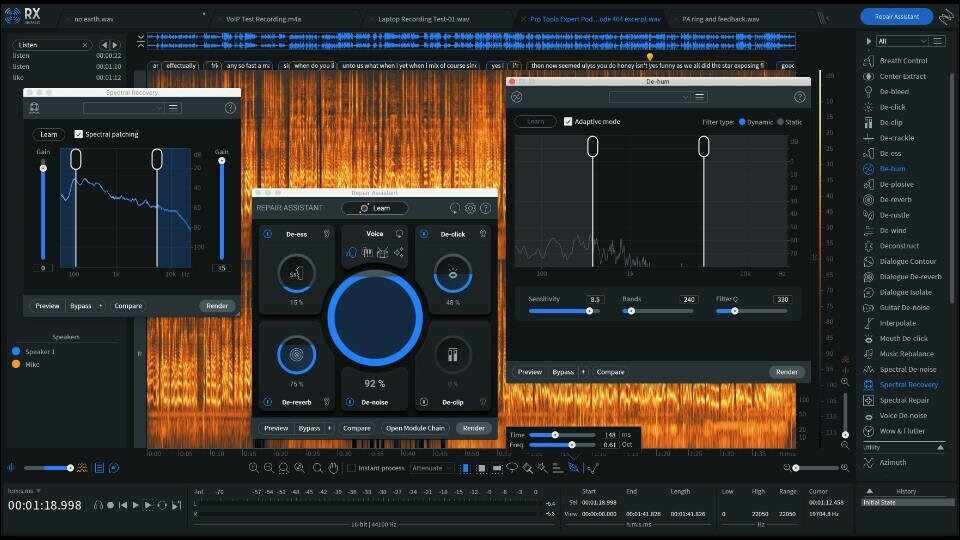
Several popular plugins are used for normalization and related tasks in audio production. These plugins offer a range of features for gain adjustment, loudness normalization, and overall mix enhancement.
iZotope RX
iZotope RX is a comprehensive audio repair and enhancement suite. It includes tools for gain staging, loudness normalization, and a range of other audio editing tasks. It’s ideal for post-production, podcasting, and mastering.
Waves WLM Plus Loudness Meter
WLM Plus is a loudness meter and controller designed to meet broadcast standards. It offers precise loudness measurement and normalization tools, for broadcasting, mastering, and post-production.
Acon Digital Multiply
Acon Digital Multiply is a versatile loudness normalization plugin. It’s part of the Acon Digital suite, known for high-quality audio processing tools. It is useful for mixing and mastering for achieving consistent loudness levels.
NUGEN Audio MasterCheck
MasterCheck is a plugin designed to help audio producers meet loudness standards across various platforms. It provides detailed loudness analysis and normalization tools, ideal for mastering for streaming platforms, broadcast, and post-production.
FabFilter Pro-L 2
Pro-L 2 is a highly regarded limiter plugin that also includes loudness normalization features. It provides precise control over peak levels and loudness, making it suitable for mastering, mixing, and achieving broadcast-compliant loudness levels.
MeldaProduction MLoudnessAnalyzer
MLoudnessAnalyzer is a comprehensive loudness metering plugin that includes normalization features. It supports various loudness standards and offers detailed analysis, making it ideal for broadcast, post-production, and mastering.
TC Electronic LM2n
LM2n is a loudness and true-peak level meter designed for compliance with international broadcast standards. It includes tools for loudness normalization and monitoring, suitable for broadcast, film, and television post-production.
Brainworx bx_meter
bx_meter is a sophisticated metering plugin that provides detailed loudness and peak level analysis. It’s useful for ensuring that tracks meet loudness standards, making it ideal for mixing, mastering, and loudness compliance.
>>> Unlock Creativity: Strategies to Get Inspiration <<<
 The Difference Between Normalization and Limiting
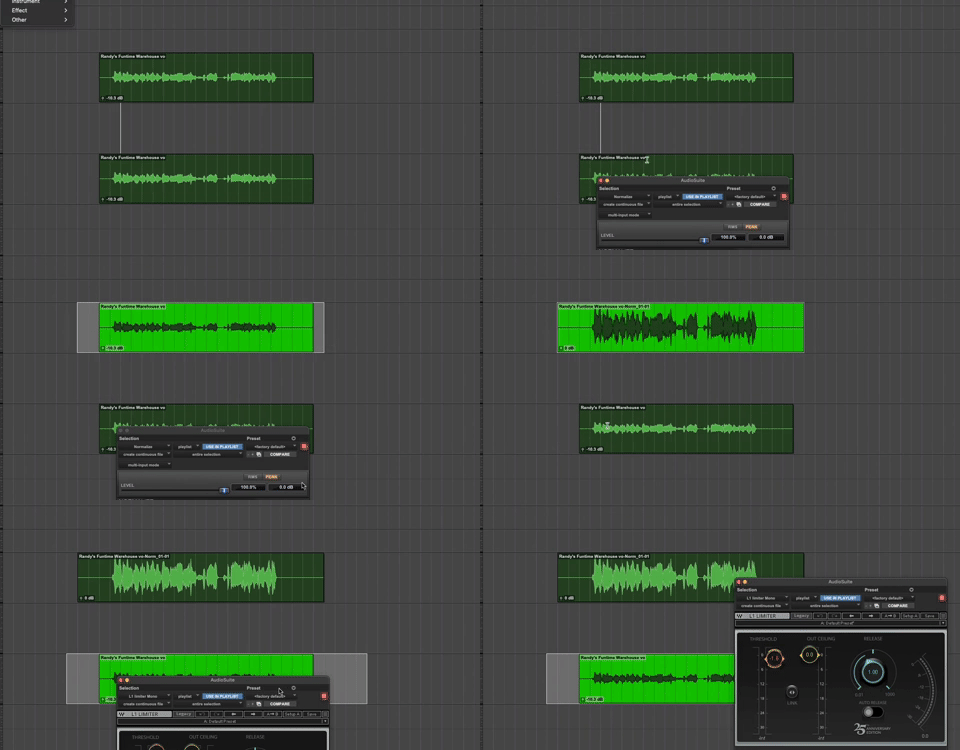
Normalization and limiting are both audio processing techniques used to control the levels of audio signals, but they serve different purposes and operate in distinct ways.
Purpose
Normalization: Ensures consistent peak or loudness levels across multiple audio files without altering the dynamic range significantly.
Limiting: Prevents audio peaks from exceeding a specified level, often used to increase perceived loudness while preventing distortion.
Effect on Dynamic Range
Normalization: Does not change the dynamic range (for peak normalization); loudness normalization might slightly compress the dynamic range.
Limiting: Compresses the dynamic range by reducing the level of the peaks.
Application
Normalization: Applied to set a target peak or loudness level.
Limiting: Applied to control peaks and prevent clipping, often as a final step in mastering.
When to Use Limiting
Limiting is a form of dynamic range compression where the audio signal’s peaks are reduced or “limited” to stay below a specified threshold. This process effectively prevents the signal from exceeding this threshold, ensuring no clipping occurs.
How Limiting Works
Threshold: A limiter sets a maximum output level (threshold) and reduces the gain of any audio signal that exceeds this level.
Gain Reduction: The degree of gain reduction is typically very high, with a ratio of infinity:1, meaning any signal above the threshold is brought down to the threshold level.
Use Cases for Limiting
Preventing Clipping: Ensuring that the audio signal does not exceed the maximum level, which prevents distortion and clipping.
Mastering: Increasing the overall loudness of a track without exceeding the maximum level, giving it a louder and more polished sound.
Broadcast and Streaming: Complying with loudness standards and preventing distortion.
>>> Audio Suite Vs Real Time Plug Ins: Workflow <<<
 Best Practices for Using Normalization and Limiting
Both normalization and limiting are essential tools in audio production, and using them effectively can greatly enhance the quality of your audio projects.
Proper Gain Staging
Ensure that your recordings have good initial gain staging. This minimizes the need for extreme normalization adjustments and prevents unnecessary noise amplification. Think of it like setting up your amps and pedals just right before a big gig.
Noise Reduction
Clean up any unwanted noise before applying normalization or limiting to avoid amplifying it. Using noise reduction tools can help maintain a cleaner signal.
Leave Headroom
When peak normalizing, leave a little headroom below 0 dBFS (e.g., normalize to -1 dBFS or -0.5 dBFS) to prevent unintended clipping. This ensures a margin for further processing or accidental level spikes.
Monitor Levels
Use metering tools to monitor levels before and after normalization and limiting to ensure there is no distortion or clipping introduced. Accurate monitoring helps in maintaining audio integrity.
Follow Loudness Standards
Adhere to industry loudness standards (e.g., -14 LUFS for streaming) to achieve consistent and compliant loudness levels without excessive dynamic range compression. This ensures your audio is prepared for various playback environments.
In a Nutshell 
Normalization and limiting are crucial processes in audio production that help achieve consistent, clear, and professional-quality sound. While normalization ensures consistent peak and loudness levels across multiple audio files, limiting prevents audio peaks from exceeding a specified level, enhancing perceived loudness and preventing distortion. Understanding the differences and appropriate applications of these techniques is essential for beginners and intermediate audio engineers.


