To Master Mixes for Streaming you’ll need to understand the nuances of loudness normalisation to ensure your tracks sound their best across various streaming platforms. So let’s take a look at what the hell the LUFS (Loudness Units relative to Full Scale) system is, focusing on Apple Music and Spotify.
The Loudness Wars and the Birth of LUFS
In the early 2000s, the music industry experienced what became known as the “loudness wars.” Producers and engineers were pushing the limits of compression and limiting to make their tracks sound as loud as possible. This often resulted in overly compressed, squashed music with very little dynamic range, sacrificing audio quality for perceived loudness.
“Over-compressed music sacrifices detail and can be fatiguing for listeners. Moving towards more dynamic range is vital for preserving the integrity of music.”
— Warren Huart (Producer, Aerosmith, The Fray, James Blunt)
Remember Metallica’s “Death Magnetic”? It’s a prime example of the loudness wars era. Fans and critics alike noted how the album sounded excessively loud and harsh, with much of its dynamic range sacrificed in the quest for loudness. Another notable mention is the Red Hot Chili Peppers’ “Californication”, which, despite being a great album, often feels like it’s shouting at you due to its aggressive compression.
But it wasn’t just rock artists who fell into this trap. Pop music had its own loudness casualties. Take Rihanna’s “Loud”and Katy Perry’s “Teenage Dream”, for instance. These albums were also mastered to be extremely loud, often at the expense of clarity and detail.
If you’re interested in learning more about whether EQ should go before or after compression, check out this detailed article: EQ: Should It Go Before or After Compression?.
Mastering for Streaming Platforms: Why -14 LUFS?
This is where LUFS comes to the rescue. The introduction of the LUFS (Loudness Units relative to Full Scale) system aimed to put an end to the loudness wars by providing a standard for measuring audio loudness that reflects how we perceive sound. Streaming platforms like Spotify and Apple Music have adopted a target loudness level of -14 LUFS. This means they automatically normalize the loudness of tracks to this level, ensuring that music with more natural dynamics sits comfortably alongside louder, more compressed tracks.
“Apple’s Sound Check algorithm ensures consistent loudness, averaging -16.5 LUFS. This regulation allows for music with more dynamic range to attract more listeners due to its improved sound quality. It’s a significant development in the fight against the loudness war.”
— Bob Katz (Mastering Engineer, Cassandra Wilson, Emmylou Harris, Joe Cocker)
Artists who embrace this new standard can now produce music with greater dynamic range without worrying about being overshadowed by louder tracks. For example, Adele and Billie Eilish have benefited significantly from this system. Adele’s “21” album, with its beautifully dynamic tracks like “Someone Like You”, maintains its emotional depth and impact even when played alongside heavily compressed pop hits. Similarly, Billie Eilish’s “When We All Fall Asleep, Where Do We Go?” leverages quiet, intimate moments to create a powerful contrast with louder sections, all while fitting seamlessly into the streaming landscape.
If you’re just learning mastering, check out the basics in this quick guide to mastering audio.
Common Mastering Mistakes Related to LUFS
Over-Compression and Limiting
One common mistake is over-compressing and over-limiting tracks to make them sound louder. While this can increase perceived loudness, it often results in a squashed dynamic range, making the track sound flat and lifeless.
“Enabling Sound Check by default would significantly reduce the disparity between the loudest and softest records, potentially ending the loudness war. Music with more conservative levels and higher peak-to-loudness ratios would stand out for its superior sound quality. This is a step towards better listening experiences for all.”
— Bob Ludwig (Mastering Engineer, Led Zeppelin, Queen, Nirvana)
Ignoring True Peak Levels
Focusing solely on LUFS without considering true peak levels can lead to distortion, especially when the track is converted to different formats or played on various devices.
Not Using a LUFS Meter
Relying only on traditional peak and RMS meters can lead to inaccurate loudness measurements. Without a LUFS meter, it’s challenging to ensure the track meets the target loudness for streaming platforms.
Ignoring Platform-Specific Targets
Each streaming platform has its own loudness normalization standards. Ignoring these targets can result in tracks being turned down or up automatically by the platform, which can affect how the music is perceived by listeners.
Choosing the right mixing software for you and your workflow is important. Check out all the best options and find the right one for you here – Find the Best Audio Mixing Software for You.
Overlooking Dynamic Range
Focusing too much on loudness can lead to a loss of dynamic range, making the track sound overly compressed and less engaging.
“Streaming services now prioritize customer experience over the loudness war. A lower LUFS standard allows for greater dynamic range, enhancing the overall listening experience. This shift is crucial for the future of music quality.”
— Brent Butterworth (Audio Journalist)
Not Using Reference Tracks
Without reference tracks, it’s difficult to gauge how your master compares to professionally produced tracks in the same genre. Regularly comparing your master with reference tracks ensures it holds up in terms of loudness, dynamics, and tonal balance. This practice helps you maintain industry standards and competitive quality.
Misinterpreting Loudness Normalization
Some producers mistakenly believe that they should master their tracks to be as loud as possible, thinking that louder is better. However, streaming platforms will normalize the loudness, potentially resulting in unintended volume adjustments.
Get your mix sounding professional. Check out – how to rock a radio-ready mix.

Mastering Your Track for Streaming: A Practical Approach
Real-World Example: Using Waves L3-LL
I’ve been using the Waves L3-LL on my master bus, and it’s been quite effective. Here’s how I approach it:
- Initial Setup: Ensure your mix peaks between -6 dBFS and -3 dBFS to leave adequate headroom.
- Setting the Limiter: Start with a threshold that engages the limiter just below the peak level of your mix. For a mix peaking at -6 dBFS, set the threshold around -7 to -9 dBFS.
- Monitor Gain Reduction: Aim for 2-5 dB of gain reduction to control the peaks without over-limiting.
- Adjust the Output Ceiling: Set the output ceiling to -1 dBTP to prevent clipping.
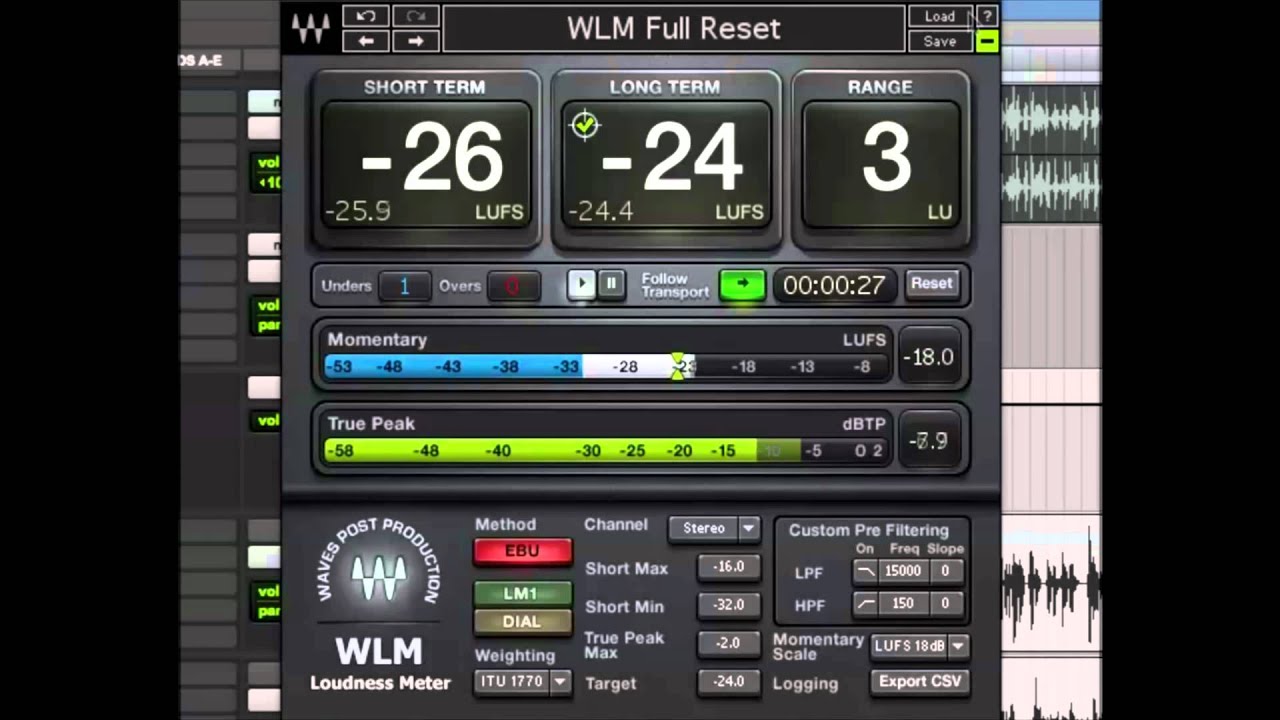
- LUFS Meter: Insert a LUFS meter to monitor and adjust the overall gain to achieve -14 LUFS.
Measuring Your Track’s Loudness
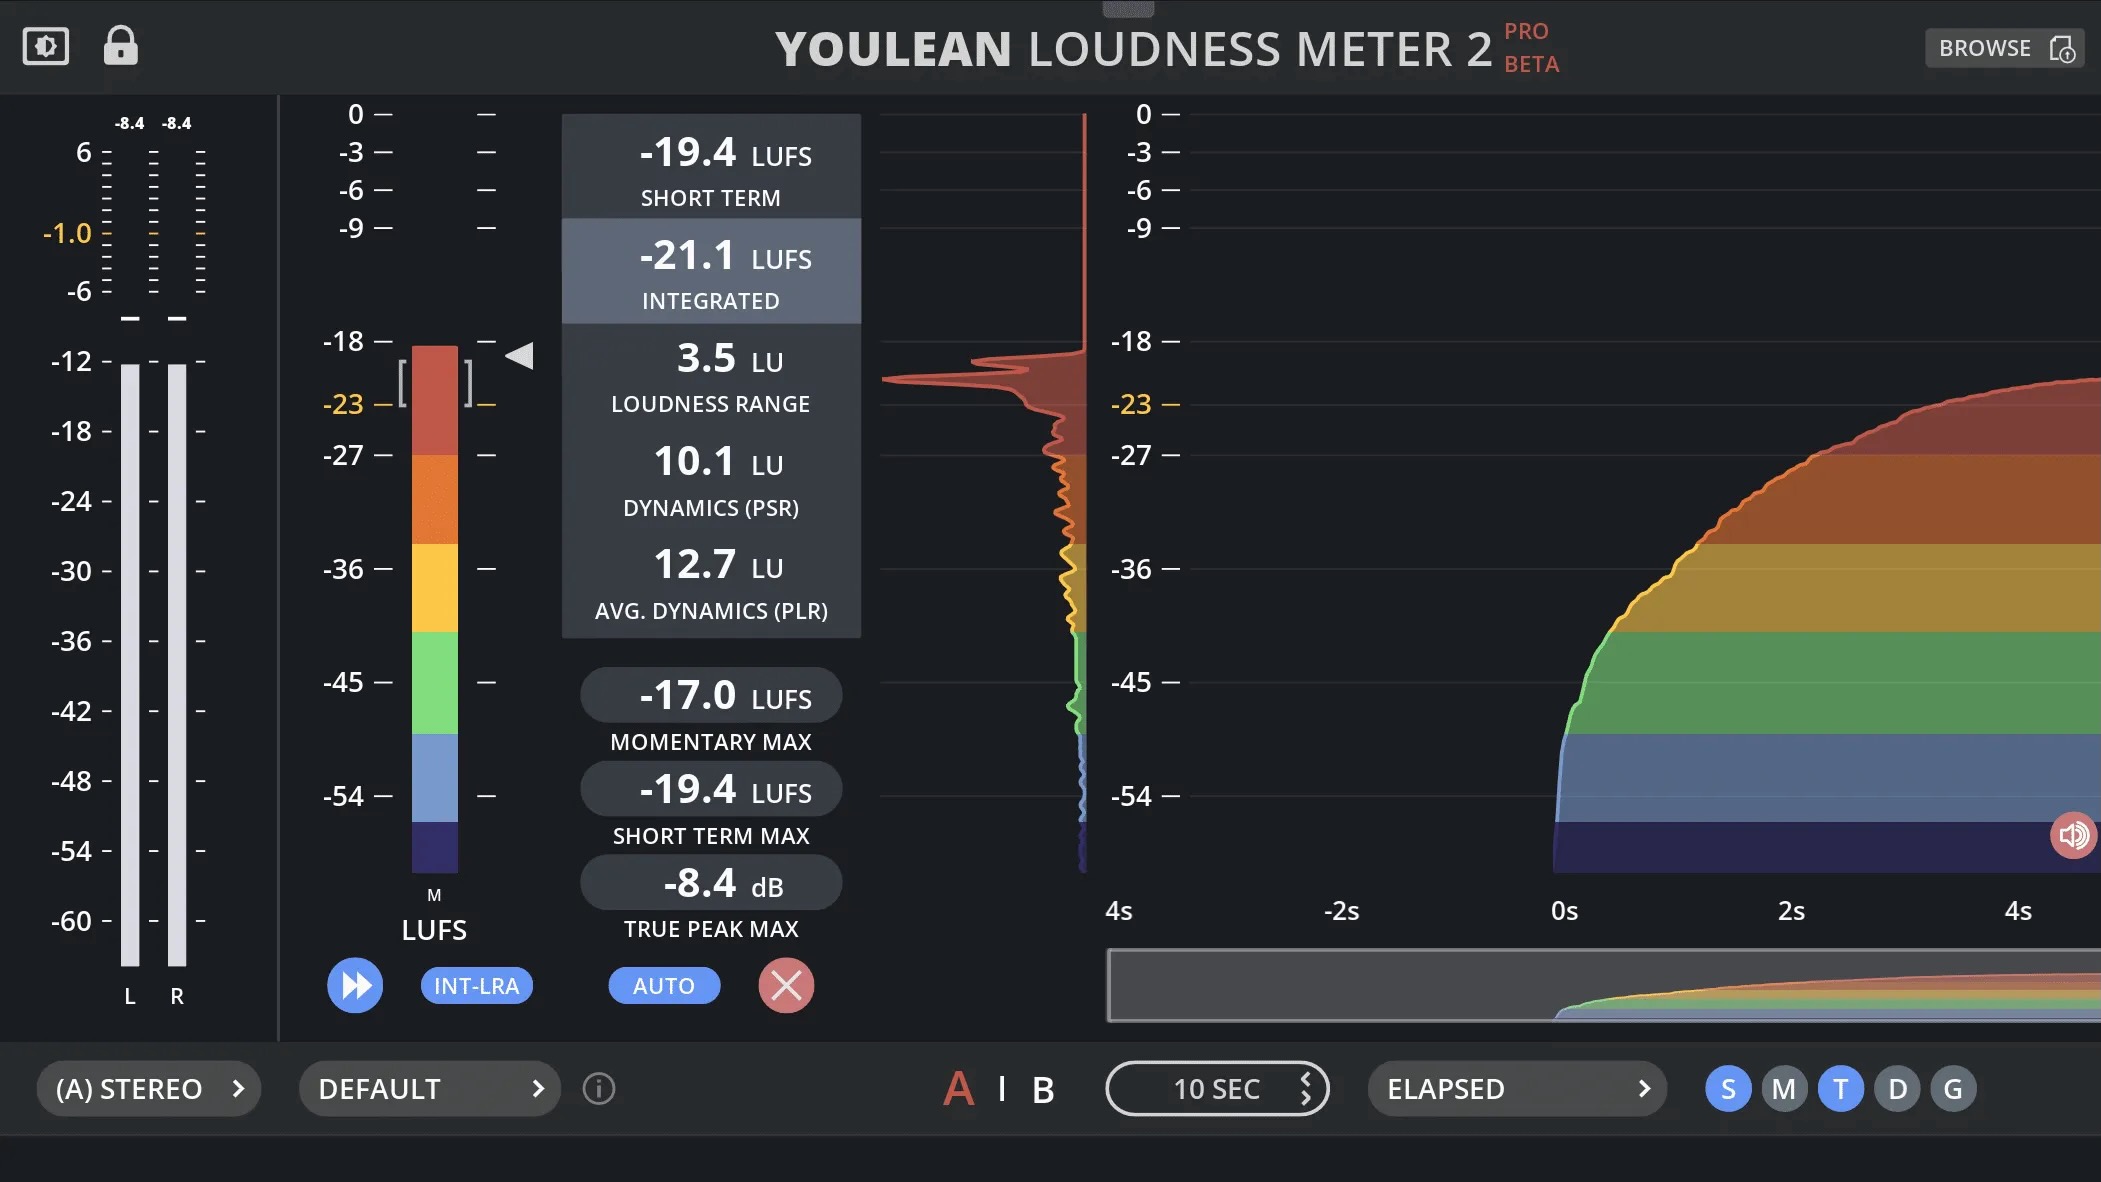
Use a LUFS meter plugin in your DAW to measure the integrated loudness of your track. Some popular options include Youlean Loudness Meter, Waves WLM Meter, and iZotope Insight.
Adjusting Loudness
If your track is too loud, reduce the gain or use compression and limiting. If it’s too quiet, increase the gain, but avoid introducing distortion. The goal is to maintain a good dynamic range while achieving the target loudness.
Loudness may be the end goal, but first you need to get everything balanced and singing from the same song book. Learn more here – Tips For Achieving A Clean And Clear Mix

Practical Steps for Mastering
Check Your Mix
Ensure your mix is well-balanced before you start mastering. A well-balanced mix translates better during the mastering process.
Apply EQ and Compression
Use equalization to balance frequencies and compression to control dynamics. This helps in maintaining clarity and punch in your mix.
Use a LUFS Meter
Insert a LUFS meter on your master bus to constantly monitor the loudness of your track. Aim for the target of -14 LUFS while preserving dynamics.
Adjust Levels with Limiting
Use a limiter to bring your track to the desired loudness. Set the threshold to catch only the occasional peaks rather than squashing the entire track. Consider using limiters like FabFilter Pro-L 2, iZotope Ozone Maximizer, and Waves L2.
Reference Tracks
Compare your track with professionally mastered tracks on the same platform to ensure consistency. This helps in making sure your track competes well with others in terms of loudness and quality.
Export and Test
Export your track and test it on different devices and environments to ensure it sounds good everywhere. Make adjustments if necessary to achieve the best sound.
For a deeper understanding of mixing and mastering, it’s crucial to know where each instrument should sit in a mix. Check out this article on where instruments should sit in a mix.

In a Nutshell
Mastering for streaming platforms requires a balanced approach that considers both loudness and dynamic range. By aiming for a target of -14 LUFS, you can ensure your music sounds great on all platforms without falling victim to the loudness wars.
Remember, it’s essential to avoid common mastering mistakes such as over-compression, ignoring true peak levels, and not using reference tracks. Use tools like LUFS meters and limiters effectively to achieve the desired loudness while maintaining the integrity of your music.
Incorporating these best practices will help your tracks stand out in a competitive streaming landscape, providing listeners with a high-quality audio experience.